The Summer of LEGO continued on well after the construction of Mondrian City. As my son and I sat across from each other at our dining room table with a pile of LEGOs between us, other creations sprang to life. With very little guidance, he was able to create a number of masterpieces. Here are some of my son's beautiful creations:
While he opted for volume, creating a veritable army of vehicles, dwellings and abstractions, I opted to design and build a single vehicle. I always tell my students that whenever you are creating art or designing something, you push the art and the art pushes you. As I started to combine LEGO pieces from the hodge-podge of kits in front of us without any real objective, a truck started to take shape. One thing I really enjoy doing with LEGOs now as an adult is taking the parts from "prescriptive" LEGO sets (the sets that direct you how to build something specific, with step-by-step instructions) and re-purposing them along with traditional bricks, Technics parts, and elements of EV3 Mindstorms.
I call the truck I created "The Beast," as it's a pretty cumbersome monstrosity of a vehicle. I utilized the brick controller and two large motors from an EV3 kit to get it moving. In order to control it, I downloaded a free app called LEGO Robot Commander to my iPad, switched on the brick's Bluetooth and synced them up. Since I own a GoPro, I also created a custom LEGO mount and placed it on the roof of "The Beast," so I could capture a POV shot.
The beginnings of "The Beast"
The completed vehicle.
Side view.
Taking a peek under the hood where the brick lives.
Custom GoPro mount.
GoPro camera on custom LEGO mount.
The GoPro on top of "The Beast"
A closeup of the GoPro on top.
Admittedly, it's not the best design. It would have been better to create a 3-wheel vehicle, using the omni-directional pinball that comes with the EV3 kit. This would have provided better turning, since all of the wheels are fixed and turns are a little clumsy. I really just wanted to see if I could get the Bluetooth control breathing and get the GoPro on board. If I had more time, I would have incorporated the medium motor and created a turntable for the GoPro to swivel it like a tank turret. Next time!
Check out the video below (kinda low quality as I shot it on my iPhone):
Thanks for checking out my blog! Hope you found it entertaining and/or inspiring. Go build something cool!
I always kick off a summer with the intention of getting so many things done, a massive to-do list compiled and awaiting me just as school wraps up. Among the items on my list was this blog and to update it with more frequency. So much for that. This summer, with its incredible fall-like weather proved too tempting to resist, so much traveling and beach going ensued.
However, I did manage to squeeze in quite a few opportunities for creative exploration and professional development, largely via the use of LEGOs.
At home, prior to the start of summer, my six year old son and I used his enormous cache of LEGOs to create a couple of fun (and quite time-consuming, as it turned out) projects. Our first undertaking was "Mondrian City," named as such due to its color scheme of predominantly primary-colored bricks. What started out as the two of us building a single structure on a building plate turned into a massive streetscape. This construction continued through the summer.
A beautiful mess.
Under construction.
Coming together.
View from the rooftop (who knew Jack Sparrow had a penthouse apartment in Mondrian City?).
Being a photographer, I then decided to take this a step further by staging a narrative scene in our city. My son and I built a LEGO robot that would visit Mondrian City, with the inhabitants flowing into the street and staring in wonder.
Robot visitor (friend or foe?)
View of the robot visitor from above.
By this point, Mondrian City had become an obsession. I began to understand what Richard Dreyfuss' character felt like in Close Encounters as he dealt with the compulsion to construct a Devil's Tower in his living room.
Next, I purchased some inexpensive micro LED lights from Amazon and placed them throughout the city. I set up an orange paper background, meant to suggest the sky at dusk. I also set up a couple strobes (flash units) to compliment the scene.
Almost ready for the big shoot.
The micro LEDs.
Positioning the camera at the end of the street at a low angle, I shot a number of frames in total darkness, the shutter open for 30 seconds at a time. The initial pop of a strobe - at the other end of the block, behind the orange backdrop, pointed at the camera - at the beginning of the exposure provided a huge burst of light behind the robot, while the remainder of the exposure was illuminated via micro LED (some in the buildings, some waved about the scene by me and my son in a "light painting" fashion. Here are a couple of the strongest images:
In general, I'm pretty satisfied with the outcome. I did want to include some sort of "smoke" to create a little atmosphere, but I just didn't get around to it. Maybe next time...
I will be posting more about the Summer of LEGO shortly, including our trip to Brick Fest, attending an EV3 Robotics workshop at Carnegie Mellon University and another original project we call "The Beast," a vehicle designed using traditional LEGOs, Technics parts and the brick and large motors from an EV3 kit. All controlled with the Robot Commander app on my iPad. Cool stuff. Stay tuned...
Below is a video I put together to showcase some of the amazing things my Digital Media Design students at OTHS create. The first half of the video highlights their work with Lego Mindstorms EV3 robotics kits and the second half captures the process of designing objects using Sketchup and printing them via our Makerbot Replicator 2. I always tell my students that they live in exponential times and I think they're finally understanding what I mean. It's a brave new world, folks.
So much to write about since I was last here. I can't believe we are half way through the school year already! Both of my courses, Digital Media Design (DMD) and Digital Photography have been progressing nicely. DMD has taken more of my attention this year since it is an entirely new course to our school (and to me).
While DMD addresses a number of digital technologies, its centerpieces are the LEGO EV3 Mindstorms robotics classroom kits (and design software) and our Makerbot Replicator 2 3-D printer. So far, we have barely scratched the surface of what both of these tools have to offer.
In this blog entry, I'll be describing our experiences to date with the Makerbot. While it is a fascinating piece of gear and truly represents what manufacturing will be in the near future, in it's current iteration, the Makerbot Replicator 2 is not a walk in the park. What I mean to say is that it is not as "plug and play" as it's marketing materials would have you believe. I do think I have finally cracked the code and have recently been achieving consistent output from it. I'll cut to the chase and give you my recipe for success in case you are considering a Makerbot for your classroom or home. After much research and many failed builds, I find that this is the way to go:
1. Design 3D models using Sketchup Make (this is the free, highly functional version). Since you just spent about $2500.00 of your (or your department's) money on the bot and a few spools of PLA filament (this is the raw plastic stock for the printer, which costs about $45.00/spool), you're probably out of cash and can't afford AutoDesk or a similar, expensive 3D software suite. And Sketchup comes with tons of support materials and videos. Check out this link to get started.
From SketchUp to physical object. Awesome!
2. Make sure Sketchup has an extension called Sketchup STL installed. An extension just extends the functionality of the software. In this case, it will allow you and your students to export finished designs from Sketchup in a format that Makerware (software that drives the Makerbot) and 3D printers understand, a .stl (stereolithography) file.
3. When designing models for 3D printing in Sketchup, choose the "Product and Woodworking (Millimeters)" template when Sketchup starts up.
4. Once the design has been created in Sketchup, go to File>Export STL and save this to a file of your choosing (either on a network or local drive). I also require that my students create a 2D thumbnail image for quick viewing as well (rotated to provide an isometric view). This can be created by going to File>Export>2D Graphic. From here, you can save the image as a .jpeg (in the same folder as the .stl).
5. You're not quite ready to print yet. The exported .stl file may have errors (that you can't see) that will trip up your 3D printer and cause the build to fail (incredibly frustrating). I HIGHLY recommend sending your .stl file to cloud.netfabb.com for FREE analysis and repair. Simply visit the website, choose your file to be uploaded, enter your email address, choose "mm" as the unit of measure, click the "agree" check box for terms of use and click "submit to cloud." You should receive very shortly and email from cloud.netfabb.com with a link to your fixed file. Here, you can preview it in 3D and download the print-ready file. Once downloaded, you will notice that "fixed.stl" has now been added to your original file name. This is helpful - you don't want to print from the original .stl file.
What a failed build looks like. Ugh.
6. Your Makerbot should be positioned away from drafty doorways in a temperature controlled environment (to avoid uneven cooling and curling of PLA plastic on build plate - this does happen). I have found that placing an incandescent light (150W or so) in front of the Makerbot raises the temp enough to provide the best conditions (I think the Replicator 2X has a heated build plate, but I'm not sure). This also allows for quick and easy release of your model from the build plate when completed.
Our Makerbot kept warm by a 150W incandescant light. Just like an Easy Bake Oven!
Note: Some people cover the build plate with either Kapton tape or painter’s masking tape and use a burnishing tool to remove any air bubbles to ensure proper release of PLA once dry. I find that by wiping down the bare build plate with isopropyl alcohol swabs works best for proper release.
7. While you can print via SD card on the Makerbot (it ships with a supplied card in its card reader port, including 4 designs), I recommend connecting your PC directly to the Makerbot's USB port (in back of machine, below PLA spool) and printing via Makerware. Once you are connected, power up the Makerbot.
8. Run build plate leveling script from Makerbot menu, using a Post-it note (instead of supplied business card) to ensure that the build plate is level and the extruder head is at the proper height. There should be very slight friction when the Post-It is dragged under the extruder head's leveling points.
9. Open Makerware on your PC and ensure that "background services" are running. This means that your computer is now communicating with the Makerbot.
10. Click on the "Add" button on top of the Makerware interface. Find your "fixed.stl" file and choose it. Position and scale it on the build platform using the tools on the left side of the screen.
11. Once the model is in position and at the size you desire, click on "Make" at the top of the screen. When the dialogue box pops up, make sure that the "make it now" button is not greyed-out. If it is, you may have to restart background services. If it is available, you're in business. I find that by leaving the other settings at the default standards, you will see great results. If your models are more complex, you may wish to explore rafts and supports (which you're need to file/sand off your model once it's finished).
12. Click "Export" on the bottom right of the dialog box and you should be good to go. The software will begin "slicing" the model into layers and the extruder head should beging warming up (until it reaches about 230 degrees C). The build should start momentarily. The builds my students create currently are designed to fit inside a 40mm cubic volume (meaning 40 mm along the longest dimension) and flat on one surface (to ensure they sit on the build plate). These small models genrally take about 45-60 min to print.
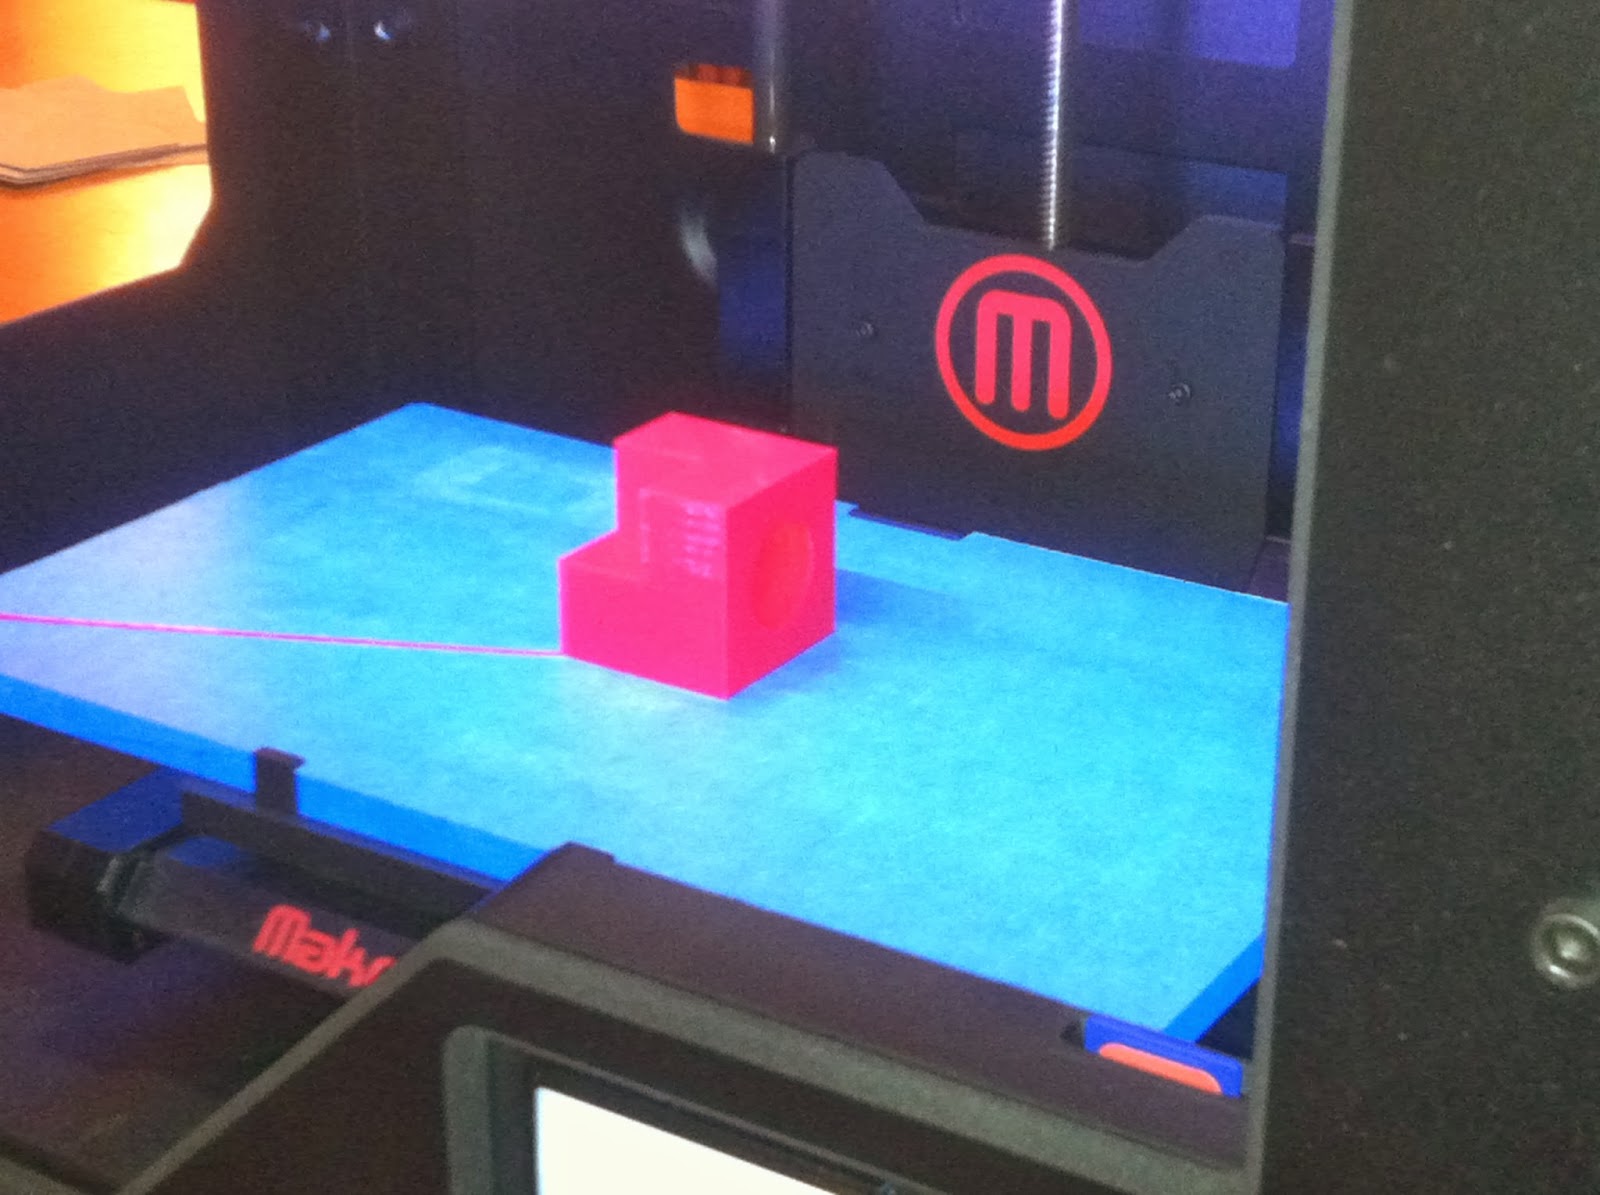
The Makerbot in action (video to be posted shortly)
Great success!
And that's it. It took me a lot of trials and tribulations, researching forums and blogs and frustration before I arrived at what I detailed above. Hopefully this was helpful to you other 3D Printing newbies out there. Now that I have cracked the code, my students and I are having a blast with our Makerbot. Good luck and feel free to contact me with any questions! Happy printing!
Wow, it really has been a while since I last posted. As we head into another school year, I thought I would showcase some work that I have been doing over the summer. While I absolutely love teaching, I also love having two months "off" each year to recharge my creative batteries, work on some fun and challenging projects (both personal and professional), and find new inspiration.
I'm getting ready to embark on my second year teaching at Ocean Township High School and I've been asked to create and teach a brand new course called Digital Media Design (DMD). I'm so thankful to have such a supportive and forward-thinking administration in my building who see the value in creating course offerings of this nature.
First things first. Before I detail what DMD is going to look like, I'll share a couple other items. I also teach Digital Photography and have been given a brand new room to teach it in. Last year I focused (no pun intended) mostly on natural light photography as the space wasn't suitable to teach studio/artificial lighting. This new room is huge and will be outfitted with a seamless backdrop, multiple monolights, light modifiers, v-flats, product tent and more. I'm looking forward to preparing the next Annie Leibovitzes and Richard Avedons for their Vanity Fair shoots!
To get my studio chops in line, I took a 10 week course at the School of Visual Arts in NYC, under the direction of Len DeLessio. I can't say enough great things about the course - Studio Lighting: What You Really Want To Know - and Len himself. It was life-changing. Seriously. I now have a greater understanding of studio processes and an appreciation for artificial light. Thanks, Len!
Below, I have posted a few of my greatest hits from the class:
An experiment with some gels.
Try to mimic Jill Greenberg's lighting set up.
An over-lit white background shot of my friend, Rachel.
This summer also provided me the opportunity to collaborate on a music video project with an amazing group of students and teachers from Eatontown, NJ. The program is known as SPEAK and its aim is to point kids in the right direction, helping them to make good choices (namely avoiding drugs and alcohol). Over the course of two days, the students wrote and recorded an original song entitled, "Choices Last a Lifetime," using Apple's fun and easy-to-use Garageband. They also shot and edited an accompanying music video, employing green screen technology and Sony's Vegas video editing software. I'm so proud of what they were able to create.
Please check out the video below:
"Choices Last a Lifetime"
Back to my other life. Digital Media Design will encompass a veritable smorgasbord of technologies - Sketchup, Adobe After Effects, Prezi, Voki, Edmodo, Google's suite of applications, digital photography, and 3D Printing (rapid prototyping). I took our new Makerbot home this summer and dug in to see how it ticks. Too cool. Check it out:
I printed all of the files that shipped on the SD card that came with the Makerbot (a chain link, a shark and a nut and bolt combo.
The Makerbot Replicator 2. About the size of a microwave oven, but infinitely cooler.
My son admiring the Makerbot's handy work.
The printed nut and bolt (this .stl file came with the Makerbot) printed with clear PLA. They fit together nicely.
Then, I dove into Sketchup, created a thing I called the Digi-Widget, brought it into Makerware (controls the Makerbot build), scaled it and printed it. It's a brave new world, folks:
But wait, there's more! Another unit in DMD will serve as an introduction to Robotics. We will be exploring the new LEGO Mindstorms EV3 kit. I have loved LEGOS since I was a kid and I am completely psyched to introduce this 21st century iteration to my students. I familiarized myself with the LEGO programming environment (based on industry-standard, Labview) and with the accompanying curriculum materials. In no time at all, I was up and running. Below is a video of the Gyro Boy, a robot that balances (unbelievably) on 2 wheels with the aid of sensors and some very sophisticated programming (I built the bot, but used the supplied program). Check it out:
Lastly, I plan to incorporate video post production into my DMD course, with the goal of building a digital film making academy of sorts. We offer TV production and broadcast media courses in our school and I built this into DMD to compliment those offerings. My students will be learning the basics of visual effects by experimenting with Adobe After Effects, another robust, industry-standard application. I got my feet wet with it by creating the clip below (thanks to my wife for being such a good sport!):
Oh yeah - one more thing! I had the opportunity to sit in on a good friend's podcast (Thanks, Larry!!!) and I am inspired to have my students create their own, using tools in the Adobe Creative Suite. I'm also laying the groundwork for my own personal podcast, as I firmly believe that modeling is one of the most powerful forms of instruction.
There will surely be more entries to come in the near future! Best of luck this school year, my fellow educators and students! Be inspired and amaze yourselves!