While DMD addresses a number of digital technologies, its centerpieces are the LEGO EV3 Mindstorms robotics classroom kits (and design software) and our Makerbot Replicator 2 3-D printer. So far, we have barely scratched the surface of what both of these tools have to offer.


In this blog entry, I'll be describing our experiences to date with the Makerbot. While it is a fascinating piece of gear and truly represents what manufacturing will be in the near future, in it's current iteration, the Makerbot Replicator 2 is not a walk in the park. What I mean to say is that it is not as "plug and play" as it's marketing materials would have you believe. I do think I have finally cracked the code and have recently been achieving consistent output from it. I'll cut to the chase and give you my recipe for success in case you are considering a Makerbot for your classroom or home. After much research and many failed builds, I find that this is the way to go:
1. Design 3D models using Sketchup Make (this is the free, highly functional version). Since you just spent about $2500.00 of your (or your department's) money on the bot and a few spools of PLA filament (this is the raw plastic stock for the printer, which costs about $45.00/spool), you're probably out of cash and can't afford AutoDesk or a similar, expensive 3D software suite. And Sketchup comes with tons of support materials and videos. Check out this link to get started.
2. Make sure Sketchup has an extension called Sketchup STL installed. An extension just extends the functionality of the software. In this case, it will allow you and your students to export finished designs from Sketchup in a format that Makerware (software that drives the Makerbot) and 3D printers understand, a .stl (stereolithography) file.
3. When designing models for 3D printing in Sketchup, choose the "Product and Woodworking (Millimeters)" template when Sketchup starts up.
4. Once the design has been created in Sketchup, go to File>Export STL and save this to a file of your choosing (either on a network or local drive). I also require that my students create a 2D thumbnail image for quick viewing as well (rotated to provide an isometric view). This can be created by going to File>Export>2D Graphic. From here, you can save the image as a .jpeg (in the same folder as the .stl).
5. You're not quite ready to print yet. The exported .stl file may have errors (that you can't see) that will trip up your 3D printer and cause the build to fail (incredibly frustrating). I HIGHLY recommend sending your .stl file to cloud.netfabb.com for FREE analysis and repair. Simply visit the website, choose your file to be uploaded, enter your email address, choose "mm" as the unit of measure, click the "agree" check box for terms of use and click "submit to cloud." You should receive very shortly and email from cloud.netfabb.com with a link to your fixed file. Here, you can preview it in 3D and download the print-ready file. Once downloaded, you will notice that "fixed.stl" has now been added to your original file name. This is helpful - you don't want to print from the original .stl file.
6. Your Makerbot should be positioned away from drafty doorways in a temperature controlled environment (to avoid uneven cooling and curling of PLA plastic on build plate - this does happen). I have found that placing an incandescent light (150W or so) in front of the Makerbot raises the temp enough to provide the best conditions (I think the Replicator 2X has a heated build plate, but I'm not sure). This also allows for quick and easy release of your model from the build plate when completed.
Note: Some people cover the build plate with either Kapton tape or painter’s masking tape and use a burnishing tool to remove any air bubbles to ensure proper release of PLA once dry. I find that by wiping down the bare build plate with isopropyl alcohol swabs works best for proper release.
7. While you can print via SD card on the Makerbot (it ships with a supplied card in its card reader port, including 4 designs), I recommend connecting your PC directly to the Makerbot's USB port (in back of machine, below PLA spool) and printing via Makerware. Once you are connected, power up the Makerbot.
8. Run build plate leveling script from Makerbot menu, using a Post-it note (instead of supplied business card) to ensure that the build plate is level and the extruder head is at the proper height. There should be very slight friction when the Post-It is dragged under the extruder head's leveling points.
9. Open Makerware on your PC and ensure that "background services" are running. This means that your computer is now communicating with the Makerbot.
10. Click on the "Add" button on top of the Makerware interface. Find your "fixed.stl" file and choose it. Position and scale it on the build platform using the tools on the left side of the screen.
11. Once the model is in position and at the size you desire, click on "Make" at the top of the screen. When the dialogue box pops up, make sure that the "make it now" button is not greyed-out. If it is, you may have to restart background services. If it is available, you're in business. I find that by leaving the other settings at the default standards, you will see great results. If your models are more complex, you may wish to explore rafts and supports (which you're need to file/sand off your model once it's finished).
12. Click "Export" on the bottom right of the dialog box and you should be good to go. The software will begin "slicing" the model into layers and the extruder head should beging warming up (until it reaches about 230 degrees C). The build should start momentarily. The builds my students create currently are designed to fit inside a 40mm cubic volume (meaning 40 mm along the longest dimension) and flat on one surface (to ensure they sit on the build plate). These small models genrally take about 45-60 min to print.
And that's it. It took me a lot of trials and tribulations, researching forums and blogs and frustration before I arrived at what I detailed above. Hopefully this was helpful to you other 3D Printing newbies out there. Now that I have cracked the code, my students and I are having a blast with our Makerbot. Good luck and feel free to contact me with any questions! Happy printing!
1. Design 3D models using Sketchup Make (this is the free, highly functional version). Since you just spent about $2500.00 of your (or your department's) money on the bot and a few spools of PLA filament (this is the raw plastic stock for the printer, which costs about $45.00/spool), you're probably out of cash and can't afford AutoDesk or a similar, expensive 3D software suite. And Sketchup comes with tons of support materials and videos. Check out this link to get started.
 |
| From SketchUp to physical object. Awesome! |
2. Make sure Sketchup has an extension called Sketchup STL installed. An extension just extends the functionality of the software. In this case, it will allow you and your students to export finished designs from Sketchup in a format that Makerware (software that drives the Makerbot) and 3D printers understand, a .stl (stereolithography) file.
3. When designing models for 3D printing in Sketchup, choose the "Product and Woodworking (Millimeters)" template when Sketchup starts up.
4. Once the design has been created in Sketchup, go to File>Export STL and save this to a file of your choosing (either on a network or local drive). I also require that my students create a 2D thumbnail image for quick viewing as well (rotated to provide an isometric view). This can be created by going to File>Export>2D Graphic. From here, you can save the image as a .jpeg (in the same folder as the .stl).
5. You're not quite ready to print yet. The exported .stl file may have errors (that you can't see) that will trip up your 3D printer and cause the build to fail (incredibly frustrating). I HIGHLY recommend sending your .stl file to cloud.netfabb.com for FREE analysis and repair. Simply visit the website, choose your file to be uploaded, enter your email address, choose "mm" as the unit of measure, click the "agree" check box for terms of use and click "submit to cloud." You should receive very shortly and email from cloud.netfabb.com with a link to your fixed file. Here, you can preview it in 3D and download the print-ready file. Once downloaded, you will notice that "fixed.stl" has now been added to your original file name. This is helpful - you don't want to print from the original .stl file.
 |
| What a failed build looks like. Ugh. |
6. Your Makerbot should be positioned away from drafty doorways in a temperature controlled environment (to avoid uneven cooling and curling of PLA plastic on build plate - this does happen). I have found that placing an incandescent light (150W or so) in front of the Makerbot raises the temp enough to provide the best conditions (I think the Replicator 2X has a heated build plate, but I'm not sure). This also allows for quick and easy release of your model from the build plate when completed.
 |
| Our Makerbot kept warm by a 150W incandescant light. Just like an Easy Bake Oven! |
7. While you can print via SD card on the Makerbot (it ships with a supplied card in its card reader port, including 4 designs), I recommend connecting your PC directly to the Makerbot's USB port (in back of machine, below PLA spool) and printing via Makerware. Once you are connected, power up the Makerbot.
8. Run build plate leveling script from Makerbot menu, using a Post-it note (instead of supplied business card) to ensure that the build plate is level and the extruder head is at the proper height. There should be very slight friction when the Post-It is dragged under the extruder head's leveling points.
9. Open Makerware on your PC and ensure that "background services" are running. This means that your computer is now communicating with the Makerbot.
10. Click on the "Add" button on top of the Makerware interface. Find your "fixed.stl" file and choose it. Position and scale it on the build platform using the tools on the left side of the screen.
11. Once the model is in position and at the size you desire, click on "Make" at the top of the screen. When the dialogue box pops up, make sure that the "make it now" button is not greyed-out. If it is, you may have to restart background services. If it is available, you're in business. I find that by leaving the other settings at the default standards, you will see great results. If your models are more complex, you may wish to explore rafts and supports (which you're need to file/sand off your model once it's finished).
12. Click "Export" on the bottom right of the dialog box and you should be good to go. The software will begin "slicing" the model into layers and the extruder head should beging warming up (until it reaches about 230 degrees C). The build should start momentarily. The builds my students create currently are designed to fit inside a 40mm cubic volume (meaning 40 mm along the longest dimension) and flat on one surface (to ensure they sit on the build plate). These small models genrally take about 45-60 min to print.
 |
| The Makerbot in action (video to be posted shortly) |
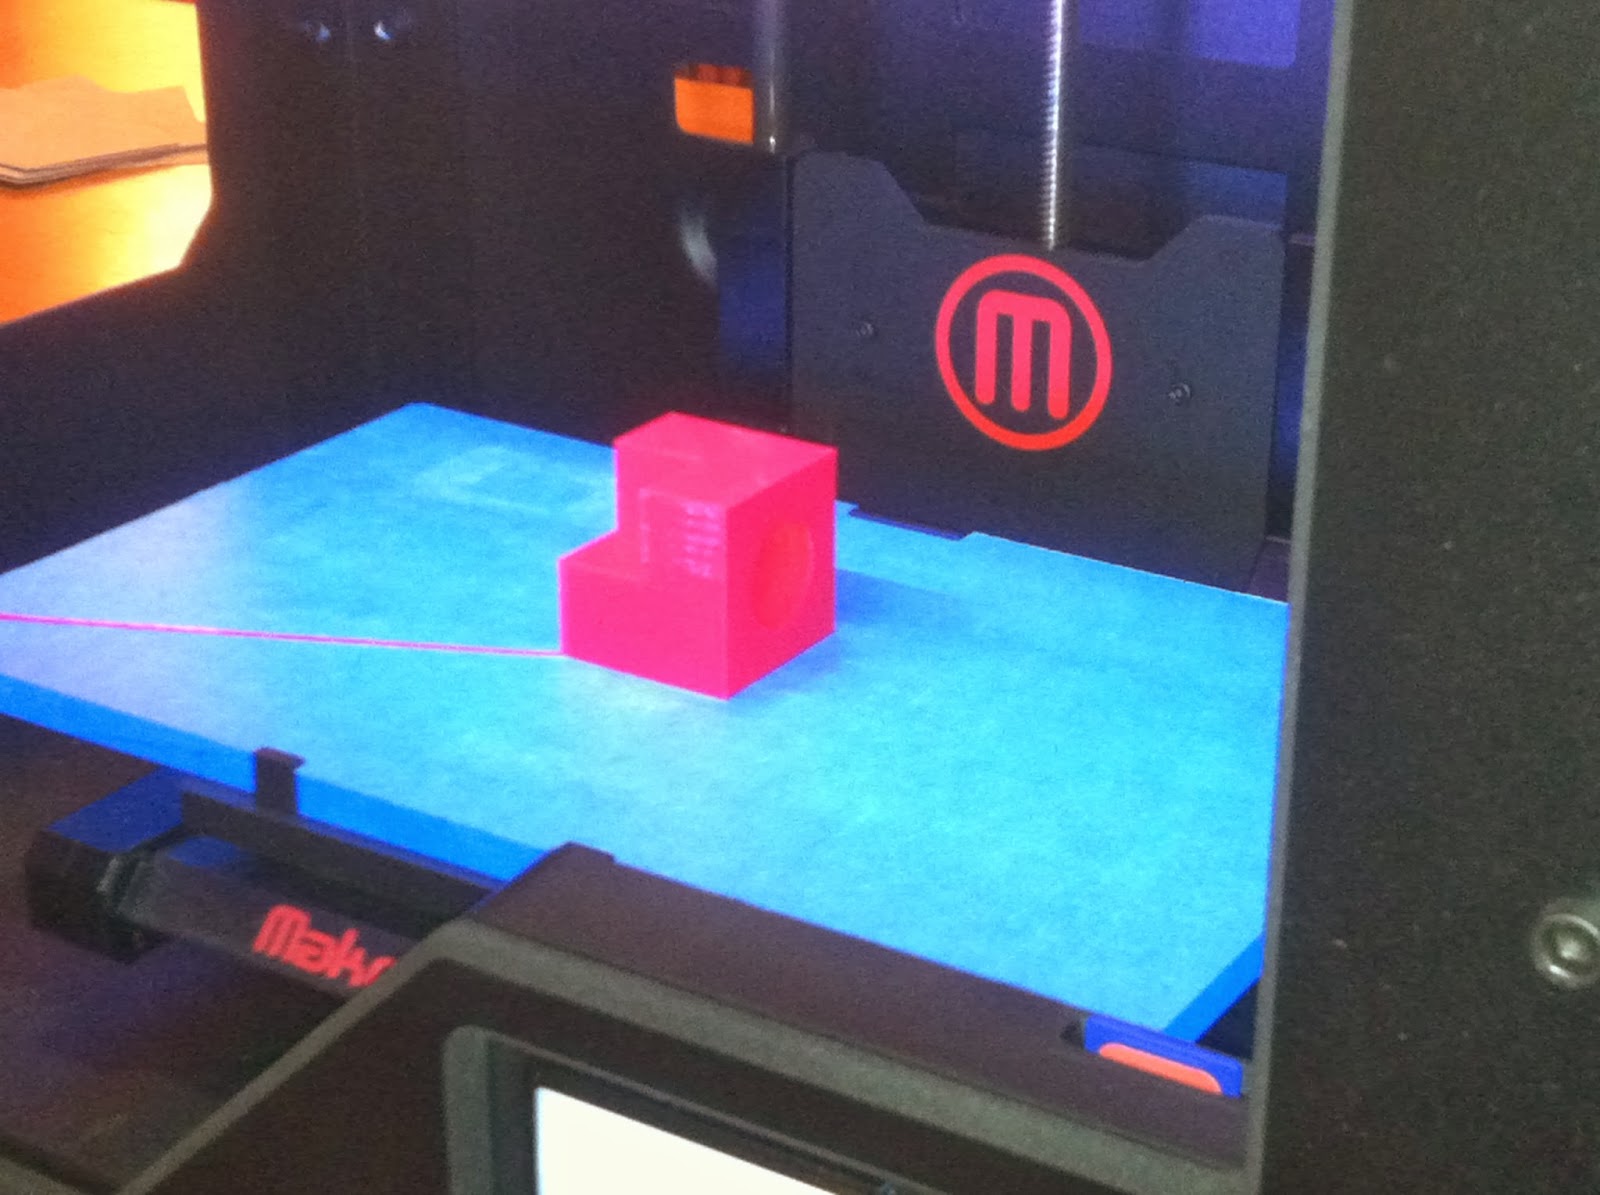 |
| Great success! |
No comments:
Post a Comment
Note: Only a member of this blog may post a comment.